Defringed!

Some of you may remember the picture I posted here last September, of the harvest moon behind the university clock tower. I had spent quite some time scouting the location and time for the shot, and used the best equipment that I owned for it. (That was before I delved into the world of rentals.) Compositionally, it was all that I had hoped for; but the limitations of my camera and lens kept it from being the frame-able masterpiece that I wanted. Oh, and the distance too – I was almost 1 1/2 miles away from the tower, so without the very high-end equipment, the detail wasn’t especially crystal-clear.

Fringed moon

The tower with the fringe on top

One of the most frustrating things about the picture was the “fringing” around the moon itself. See it? It’s that reddish-brown color that surrounds the moon, and separates the moon from the tower. I wasn’t familiar with the term “fringe” until I noticed this problem. I tried everything I could think of in Photoshop to get rid of it, including using the Defringe command. (That’s where I learned the term!)  The fringing looked just awful when I tried to print out the picture.

I revisited the photo a few times over the winter, to no avail.

Well, good things come to those who wait. A new version of Lightroom was quietly released this week, and one of the enhancements was listed as “additional Color Fringing corrections to help address chromatic aberration.” I finally got a chance to try the new version out yesterday… and WOW!

Thank you, Adobe, for Lightroom 4.1.

I haven’t printed out the picture just yet. I know I can’t expect perfection – applying the sharpening tools will add to the noise, and the noise reduction tools will blur things up – but this defringing tool is huge.
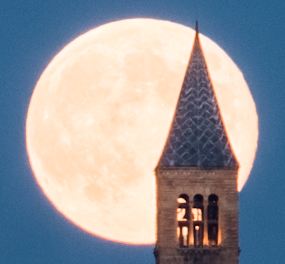
Harvest Moon

Defringed!

READ THE MANUAL!

One of the responsibilities of my day job is to write instructions for people who don’t want to read manuals. The stuff I write tends to be in the form of step 1, step 2, etc., and I am always sure to use little words and include a lot of white space.

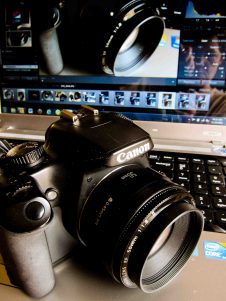
I understand why people just want to cut to the chase. I’m generally just as bad as the next person about reading manuals, since I’m always too eager to get to the job at hand instead of delving into details. But after spending time this morning gazing longingly at web sites about the camera of my desire, I decided to revisit the manual for my Canon XS to see if there might be a few more tricks that I could get it to perform.

Well, well, well. It turns out I had forgotten all about “Picture Styles”, which allow you to adjust sharpness, contrast, saturation, and color tone in-camera instead of relying on a program like Lightroom. Once I saw them discussed in the manual, I remembered that I had first come across them when trying to capture the nesting herons last spring. After that, though, I had semi-permanently set my camera to Landscape mode.

I thought it might be interesting to take multiple pictures of the same subject to see what the difference was. I created my own Picture Style and set it so that the sharpness and contrast were all the way up on the dial.

Here’s the before version, taken in standard mode:

Picture of a dormant plant

Before (standard)

And the after version, taken in user-defined mode:

Dormant plant

After (user-defined)

Both of these are “SOOC” (straight out of camera), except for a little cropping. I really prefer the user-defined settings, but I understand that it’s a question of taste. Last year in Jackson Hole, I remember hearing a disagreement between the pro-that-works-for-Nikon and the pro-that-works-for-Sports-Illustrated, with one saying that it was better to sharpen in-camera and the other saying it was better to sharpen with software after the fact. Right now I’m leaning towards the in-camera sharpening.

In case you’re not seeing much of a difference, here’s a close-up:

Closeup with standard setting

Close-up with standard setting

Close-up with user-defined setting

Close-up with user-defined setting

Like a couple that is told by the marriage counselor to start dating again, I’ve found that I’m re-discovering things that my camera had all along.

Prime Time

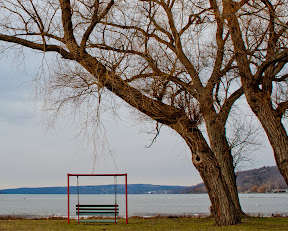
Winter by the lake

Winter by the lake

It’s always exciting to get new equipment for my camera, and so today’s arrival of a new lens – paid for with a Christmas gift certificate – was a special occasion. I can finally put the 18-55 mm kit lens away: I’ve now got a 24mm wide angle lens in my camera bag.

One of the many things I’ve learned this year about lenses is that prime lenses – i.e. those with a fixed focal length (they don’t zoom) – are generally sharper than their zoom counterparts. To quote Wikipedia:

A prime lens of a given focal length is less versatile than a zoom whose range includes that focal length, but is often of superior optical quality, lighter weight, smaller bulk and lower cost. In comparison with a zoom lens, a prime lens has fewer moving parts which are optimized for one particular focal length. With a less complicated lens formula they suffer from fewer problems related to chromatic aberration.

See? Superior optical quality and fewer problems related to chromatic aberration. That’s good news.

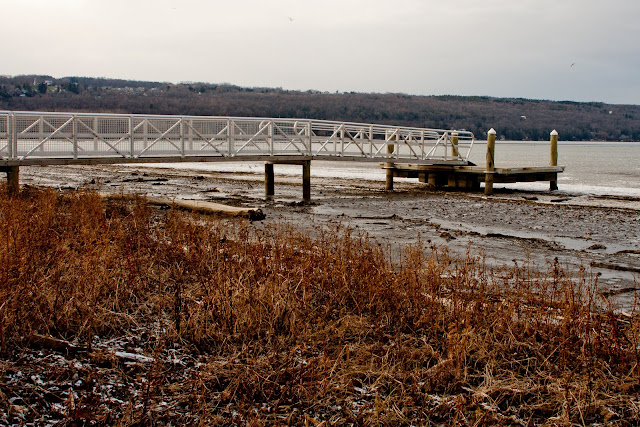
I’ll be counting on the wide angle to get those beautiful sunrises and sunsets that have been somewhat elusive. Today has been pretty gray (and cold!) though, so this afternoon I went looking for some other wide-angle subjects down by the lake:

Lakeside

Look at what washed ashore!

Lakeside

Lakeside lookout

My husband laughed at me for using a wide-angle lens and then cropping this one:

Winter Storage

Winter storage

Welcome to my arsenal, little 24mm. I know you’ll serve me well.

In lieu of the perfect holiday card

One day, back in the days when we used to have snow in winter (i.e. last January), I was passing by some holly bushes with snow on them, and thought – Hey! I can use this new hobby of mine to create some lovely holiday cards next year! I had the S90 with me that day, and so I took a few minutes to snap some macros of holly berries and snowy leaves.

Holly Berries

Holly Berries

The results were OK, but not especially compelling. I decided to wait for another sunny day with fresh snow. I’m still waiting. It looks like there won’t be any pretty cards with fresh snow-covered berries this year.

My next photo card idea, which occurred to me right around Thanksgiving, was to play a bit with bokeh – you know, the circles (and other shapes) that you see when there’s an out-of-focus light source in the shot. (My husband claims that he sees bokeh all the time when he doesn’t have his glasses on.) I still kind of like my first attempt at this idea, but it was voted down by the spouse.

Candlelight

Candlelight

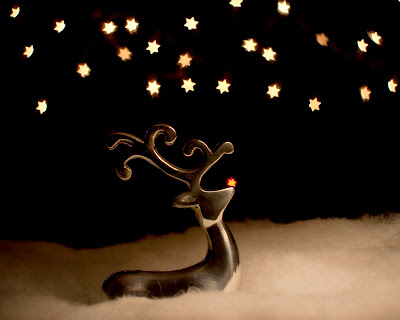
While reading about bokeh online, I came across a reference to the Bokeh Masters kit which turns your bokeh into different shapes. Wouldn’t that be fun for a card! And I had just the subject (husband approved), a reindeer in the snow, on a starry night.

Well, I worked and worked and worked with the reindeer, on multiple occasions. I just couldn’t get the lighting right – the reindeer was too dark, or the fake snow was overexposed, or you could see the wiring between the “stars”. And my favorite prop, a red light for the nose, just kept falling over. Trying to fix these things in Photoshop only made them worse. I started thinking of changing the name of this blog to The Frustrated Photographer.

Starry starry night

Rudolph takes a break

Yesterday I made one last attempt at a nice holiday bokeh shot. (I say that, but the perfectionist in me suspects that I won’t actually let this thing go.) I pulled out the new tripod I got for Christmas, filled a holiday wine glass with Christmas balls, set the glass on a table in front of the tree, and fired away. I’m disappointed with the outcome on many levels, but I think the biggest problem with it is the two flavors of light (warm and cold.) Also, there are too many points of light in the background – I couldn’t get any closer to the tree without blocking the kids’ view of their new video game.

Holiday bokeh

Holiday bokeh, warm and cold

And so I’m afraid that I won’t be sending out any nice holiday photo cards this year. I long for the days where I could just go card shopping at Hallmark. I gaze with envy at the photo cards that my friends have sent, thinking how much better they look that what I’ve been able to produce. Sigh.

Despite all this, I had a wonderful Christmas day with family and friends, and am grateful for all I have and for all I’ve learned. I hope that our friends know that even though we didn’t send cards this year, that we’re thinking of them and hoping that they’re well.

Happy Holidays, everyone.

The Anniversary Post

It’s my anniversary! Woo hoo!

A year ago today, I purchased my first DSLR, and then started a blog about it for two reasons: first, to keep myself motivated in learning how to use the camera; and second, to document what I was learning so I could use it for reference later. And the blog has worked on both counts. The first time I picked up the camera, I was scared of it! It seemed too big and it had so many moving parts. And I think those first few posts are a good indication of just how much I had to learn. (In case you missed it, I posted my favorite shots from the year a couple weeks ago. I’ve improved a little.)

For this anniversary post, I’ve put together a short compilation (extremely condensed) of the things I’ve learned about photography in this past year. And I know now that for each item on this list, there’s an infinite number of things to learn still.

So here goes:

  1. Camera

    My constant companion

    Always carry a camera

  2. Check off the mental list: camera, correct lenses, card, charged battery. You’d be surprised at the number of times, early on, I’d forget an essential component.
  3. Mechanics – ISO, Aperture, shutter speed, white balance, etc., etc., etc.
  4. Depth of field
  5. Lens choice – close up wide-angle vs. far-away zoom
  6. What metering is. Why shoot in RAW.
  7. EXIF data – the camera settings are all documented in the image file!
  8. It’s all about the light – off-camera lighting, dawn & dusk, backlighting, seeing where the shadows fall, there’s actually such a thing as too much sunshine (still to be documented: filters!). This is still an area to explore.
  9. Calibration – printing and monitors. Another area where I have a LOT to learn.
  10. Composition. Is it possible to master this?
  11. HDR – or, combining pictures to deal with too big a variation in light.

Tools

Lightroom

Lightroom

  1. Photoshop
  2. Viveza
  3. Lightroom
  4. Picasa. Each of the above has its special niche.
  5. The Photographer’s Ephemeris – critical in helping me get this shot of the harvest moon. Now all I need is a full-frame camera and a much better tripod.
  6. GPicSync for geotagging photos (adding latitude / longitude to the EXIF data, so you can match them up with a map)

Nature

Frosty leaf

Lots of nature to see

  1. Awareness – I can’t say enough about how being out with the camera has raised my awareness of my surroundings – the rising and setting of the sun and moon; where the shadows are; movements of tiny critters; the sounds that are everywhere
  2. Discovery – I discovered that spiderwebs are iridescent when the sun is low;  there’s magic in water drops; in a thaw after a frost, the leaves snap-crackle-pop as they fall off the tree; the sky is most colorful before dawn and after sunset
  3. Identification of bugs, flowers, trees

Entertainment

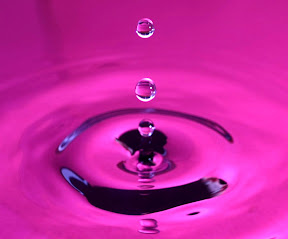
Water drops

Plop... plop... plop...

  1. Indoors – when it’s nasty outside, there’s plenty of fun to be had indoors. Most of it involves flash of some kind or another, so I expect to stay busy working on that learning curve over the winter.
  2. Outdoors – zoom burst and panning and any number of other ways to stay entertained.
  3. Everything else – it’s all entertaining – why do it otherwise?

Misc

  1. Good critiques are essential for getting to that next step
  2. Personal style – everyone has, or develops, a personal style. I’m still working on it, but I get the biggest charge from capturing the things that other people overlook
  3. Flash photography – there’s way too much to learn!
  4. Silhouettes – I love them
  5. Timing – you can’t always capture the same moment. Grab it while you can. (Sometimes this is easier said than done!)
  6. A little bit of Photoshop is not cheating
  7. Photographer’s rights – the best source I’ve found (in the US anyway) is here: http://www.krages.com/phoright.htm

It’s been a great year of learning! A GREAT BIG THANKS for all the fantastic support and encouragement that you’ve given me during this process. Here’s to another year of photos and fun!

The favorites, if not the best

It’s been almost a year since I started this blog – its first anniversary will be on November 26, the day that I bought my DSLR. I was intending to use a Thanksgiving-weekend post to reflect on what I’ve learned in this past year, and as part of that, I planned to include some of my favorite shots.

While I’m positive that Scott had no intention of modifying my blog anniversary plans, it turns out that this month’s assignment is to post 3 or more of the “best” pictures of 2011, and that the due date is coming up on Wednesday. So I’ll celebrate a 50-week anniversary instead… and interpret the word “best” as “personal favorite”.  I’ll also save the learning-reflection for another time.

And one last thing before the pictures: the instructor for the class I just finished pointed out that the photographer will see something different in a photo than a casual observer, since he/she has an experience linked with the shot. Each of the pictures that I’m sharing here have some of my memories attached to them, so I know that you won’t be seeing them the same way I do.

And now… presenting my personal favorites for 2011 (so far):

1. From way back in January, when I first got my macro lens. This is a picture of the frost on my garage window:

Frost

Life is in the tiny details

2. From a rare sunny weekend day in February:

Squirrel

Here's looking at you, kid

3. These next two are from my May trip to Jackson Hole, which was a really fantastic experience with many, many great memories attached.

Ground Squirrel

We were best friends by the end of the photo session

Morning Dew

This represents my memories from the Jackson Hole trip

4. I had this shot of Great Blue Herons changing nest duties printed on aluminum – it’s the only one I’ve taken that’s hanging in my home. So far.

Great Blue Herons

How I learned about silhouettes

5. This shot, looking down at the dock and lake at my family’s place in the Adirondacks, reflects how I want summer to be (but how it doesn’t usually play out):

Lake Reflection

Reflections

6. Where “favorite” overlaps “learning”: I finally learned that the sky is its most colorful before the sun comes up and after the sun goes down.

Three's a Crowd

Three's a Crowd


Looking back through the hundreds of pictures that I’ve saved over the last year not only brings back many memories – good and otherwise – but also makes me realize how differently I look at things now than I did 50 weeks ago.

Harvest Moon

Harvest Moon

McGraw Tower, Uris Library, Cornell University

I started planning this a few months ago. I was telling my friend Marina of my frustrations with the moon photos I took back in March: because it was so dark outside by the time the moon rose, my choices were either to end up with not enough detail on the buildings or not enough detail on the moon. Marina suggested that I try to see what I could do with the harvest moon.

So I looked up the date (September 12), started up The Photographers Ephemeris, and started plotting: when to go, where to stand, what lens to use, what settings to use.

The only thing I forgot during the planning phase was that moonrise behind a big hill is a little later than published. That worked out to my advantage because it put a little more space between the sunset and the moonrise… I just needed to move a little farther north (about 50 paces) to get my shot. (It was about a 20 minute difference – long enough that some passersby asked if I was waiting for aliens. I told them no, but at that rate, the aliens might arrive before the moon came up.)

I think I’ll do a little cleanup (get rid of those power lines!) and then see about getting some prints.

Camera envy

In the last few weeks, with the warmer weather, I’ve been encountering other photographers while I’ve been out and about. More often than not, they have enormous cameras with enormous lenses. And for what it’s worth, they’re usually male and somewhere in my age range (or older). Without going too far into sociology or demographics, I’d venture a guess that they have some more disposable income than average.

Given that the places that I go tend to be attractive to nature and bird photographers, the long lenses aren’t surprising. But since my camera is the least expensive of the entire Canon DSLR line, I’m a little sensitive about its size. I have no idea whether these other guys are getting better shots than I am. It may be that they just spent more money on their camera because they could – and that they have no idea what they’re doing.

The difference in camera size is even more pronounced – and funnier – when I’ve got the S90. It’s pocket-sized so it looks like an average point-and-shoot (when in fact it’s an above-average point and shoot!)… yet I’ve taken some of my best shots with that little guy.

Bee on flower

Bzzzzzz with an S90

So the question I have is: if I were to spend more $$ on a bigger camera, what would it really buy me? To answer this question, I spent a little time researching the available options.

To simplify my comparison here, I’ve created a chart with one camera from each of the categories of cameras in the Canon line: entry level, midrange, high end. (I’ll skip the “flagship” 1D line, since it’s unlikely I’ll ever go that route.) There are many differences within each line that aren’t explored well in the chart below, such as the massive ISO values (102400!) found in some of the cameras not listed – allowing shots in extremely low light. It’s also worth noting that there’s very little difference between the T3i, which is considered part of the entry level offerings, and the 60D (midrange) – only price and sturdiness. There’s a full chart available on Wikipedia for people who want the big picture.

Entry Level:
XS 1000D
Midrange: 60D High end:
5D mark ii
Price (B&H) $479 $999 $2499
Sensor APS-C APS-C Full Frame
Megapixels 10.1 18 21.1
ISO 100-1600 100-12800 50-25600
Frames per Second 3 (jpeg), 1.5 (RAW) 5.3 3.9

There are other items that I didn’t include in the chart because they’re less likely to factor into my personal camera choice:

  • video. I’m not especially interested in video now. My XS doesn’t have it (the s90 does).
  • how sturdy is the build? More expensive = sturdier
  • amount of exposure compensation — how much can I overexpose / underexpose on purpose?
  • shutter speed – important for sports and fast-moving things
  • type of viewfinder
  • metering options – important to me only because the XS doesn’t have spot metering
  • endless numbers of white balance options (can be adjusted in RAW)
  • endless numbers of focus points
  • weight. The more expensive the camera, the more it weighs!
  • etc. etc.

The big jump between the midrange and high-end cameras is in going to the full frame sensor. The differences between the APS-C and full frame sensors is explained here and here; the gist of it is that the full-frame sensor is especially good in wide-angle shots and low light (high ISO) situations. However, both of these sites point out that with a long zoom, the APS-C sensor can be better.

So now that I know what I’m missing, I feel a lot more confident that under normal conditions, and for what I’m looking to achieve now, my little XS is able to compete with the big guys. Replacing it is not immediately necessary (unless it breaks, or I find an outrageously good deal on Craigslist.) No doubt when replacement time comes, there will be a whole new set of available options.

Bees on Sunflower

Bees on a Sunflower (also taken with the S90)

Is it OK to photograph random people?

Is it OK to photograph random people without their permission? Is it weird? (Or, how weird is it?)

Last summer I took a workshop in street photography at the Community School of Music and Arts. It was a small, fun class, on a beautiful sunny day, and as part of it we went out into the streets of downtown Ithaca 3 separate times. All of the participants were relatively new to photography, and so our concerns were all the same – do I have to ask someone to take their photo? What if they see me?

The answer was – in the US, it’s OK to take take people’s pictures if they are in a public place except when they have a reasonable expectation of privacy. There are lots of sources online for this information, which makes me think it’s reliable.

I was way out of my comfort zone in the active part of the workshop, but forged ahead anyway, and was generally pleased with the results. I found that if someone noticed me and started asking questions, they accepted my response and let me continue on. I’m sure it helps that I’m not an especially scary looking person. On a couple of occasions since then, I’ve taken shots of cute little kids (and puppies!), and the moms have been OK with it.

So the next question is, what are the legalities surrounding how the photos are used? I’ve been looking online for that answer, too, and haven’t found a definitive response. However, I’ve gathered that it’s generally OK to post photos of people on flickr / picasaweb, but generally unethical to do so if it makes them look bad. Certainly, I’d take down a photo of someone if they asked me to do so. Selling a photo for profit changes the rules, and moves into the realm of model release forms.

Yesterday was a great day to be out shooting photos. The animal science undergrads ran a petting zoo event; the vet school had an open house; and the weather was beautifully warm and sunny. The petting zoo was just cuteness everywhere, and no one seemed bothered by my camera, not even the moms. In the evening, I went over to Sunset Park to work on capturing sunsets (of all things)… and people there, all adults, seemed very weirded out by me and my Canon. I saw my doctor walking her dog, waved to her, and she turned around and went the other way! (Granted, I only see her once a year, but still.)  One of the subjects of my favorite photo of the day turned around and stared me down shortly after I shot it. But, I believe it’s within my rights to put it online – and it fit the current challenge theme of “light/shadow” – so here it is.

Sunset Park

Sunset Park


Comments from anyone who can fill me in on the finer points of the law would be most welcome!

Tag-team Photography

During lunchtime a couple weeks ago, a colleague and I went up to the 5th floor of the Johnson Art Museum, where she patiently waited while I aimed the camera out the window. Most of the photos I came away with that day were pretty dull, but I spent some time processing one of them – of Risley Hall – and posted it on Flickr.

Risley Hall

Risley Hall, taken from The Johnson Art Museum

Fast forward a few weeks. On Wednesday I received a “flickr mail” from musician / photographer Andy Wheeler, saying that he had taken this photo and applied a “tilt-shift” effect to it, and was that OK?  Was it!!  I love Andy’s work this one of the old Grossingers resort pool (“turned terrarium”) is one of my very favorites – so following his super-private link to see what he had done with the Risley photo was a real treat.  Of course I responded yes, that’s fine, if you put it up somewhere please give me credit for the original.

So he posted it on his Flickr photostream, along with an explanation of tilt shift (which uses blurring to make you think that the object is a miniature). I’ve included it here for your viewing pleasure:

Tiny Risley Hall

Tiny Risley Hall, by A.D. Wheeler

Thanks again Andy! Maybe we’ll have a chance to collaborate again in the future.